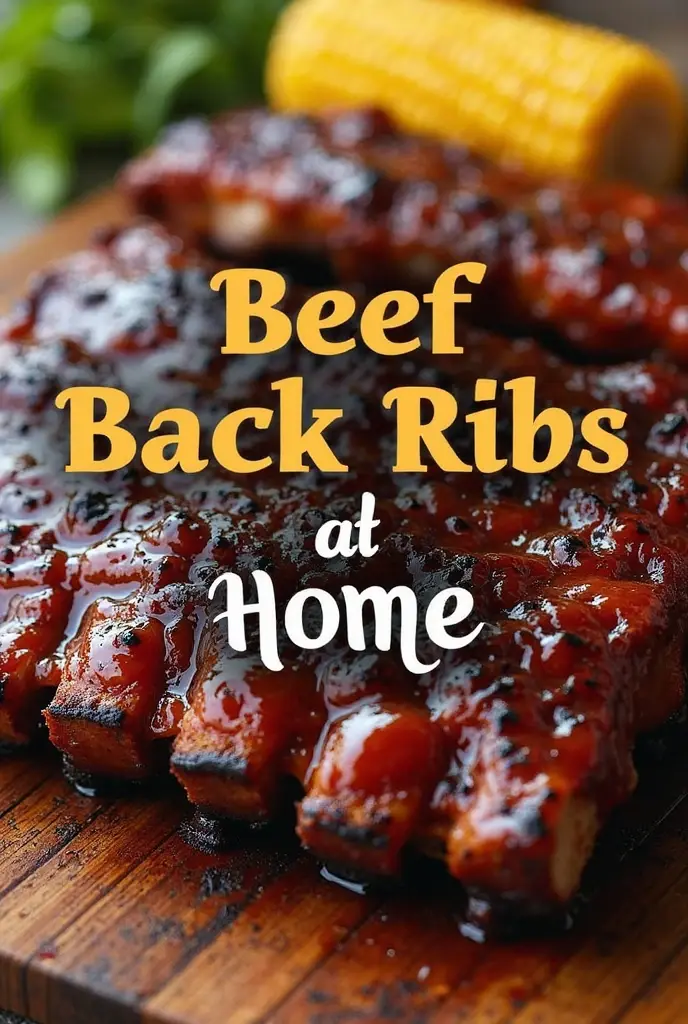
Perfect Beef Back Ribs at Home: Juicy, Tender, and Delicious
The smoke curls around your backyard like an aromatic promise, carrying whispers of hickory and the rich scent of slowly caramelizing beef. You stand beside your grill, tongs in hand, watching over a rack of beef back ribs that will soon transform into something magical. This isn’t just cooking – it’s an ancient ritual that connects you to generations of pitmasters who understood that great BBQ cannot be rushed, only respected.
Perfect Beef Back Ribs represent the pinnacle of backyard barbecue mastery. Unlike their pork cousins that forgive mistakes with generous marbling, beef back ribs demand your full attention and reward your patience with flavors that dance between smoky, savory, and impossibly tender. Whether you’re preparing for a weekend gathering or simply craving that restaurant-quality experience at home, this comprehensive guide will walk you through every crucial step needed to achieve BBQ excellence.
Table of Contents
Why Beef Back Ribs Are the Ultimate BBQ Challenge Worth Mastering
Your journey into serious barbecue begins with understanding what makes beef back ribs special. Cut from the ribeye section of the cow, these ribs offer a leaner profile than short ribs while delivering intense beef flavor that pairs beautifully with smoke and spice. The challenge lies in their lower fat content – overcook them slightly, and you’ll end up with expensive jerky.
The reward for mastering this technique extends far beyond a single meal. Each rack of beef back ribs costs between $6-12 per pound, making them a premium investment that deserves your complete attention. When executed properly, you’ll achieve results that rival steakhouses charging $40+ per portion.
Nutritionally, these ribs pack approximately 25 grams of protein per serving alongside essential B-vitamins and iron. You’re not just creating comfort food; you’re crafting a nutrient-dense centerpiece that satisfies on multiple levels.
Understanding Beef Back Ribs: Your Foundation for Success
Before you fire up your smoker, take time to understand what you’re working with. Beef back ribs come from the dorsal section where ribeye steaks originate, which explains their exceptional flavor potential. Unlike plate ribs or short ribs, back ribs feature a higher bone-to-meat ratio, requiring different techniques to achieve optimal results.
Selecting Perfect Beef Back Ribs at the Market
Your success begins at the butcher counter. Look for racks weighing 3-4 pounds with bright cherry-red coloring and minimal gray areas. The bones should appear straight and clean, without cracks or splintering that indicates rough handling.
| Quality Indicator | What to Look For | Red Flags |
|---|---|---|
| Color | Bright cherry red | Gray or brown patches |
| Marbling | Thin white fat streaks | Large fat caps or no marbling |
| Texture | Firm, slightly moist | Slimy or sticky surface |
| Bone Structure | Straight, intact bones | Cracked or damaged bones |
| Aroma | Fresh, mild beef scent | Sour or off odors |
Avoid ribs with excessive external fat caps – you want marbling within the muscle tissue, not thick layers you’ll need to trim away. Fresh ribs should feel firm to the touch and spring back when pressed gently.
Essential Equipment and Ingredients for Beef Back Ribs
Success in BBQ comes from preparation, and that starts with having the right tools. You’ll need a reliable thermometer system – both instant-read for quick checks and probe thermometers for continuous monitoring. Heat-resistant gloves protect your hands during the inevitable adjustments, while a sharp boning knife helps with initial trimming.
Your Complete Ingredients Arsenal
| Category | Ingredient | Quantity (Per 3-4 lb Rack) | Purpose |
|---|---|---|---|
| Meat | Beef back ribs | 1 rack (3-4 lbs) | Your canvas |
| Base Rub | Brown sugar | 1/4 cup | Caramelization magic |
| Base Rub | Kosher salt | 2 tbsp | Moisture retention |
| Base Rub | Coarse black pepper | 1 tbsp | Heat foundation |
| Flavor Rub | Paprika | 2 tbsp | Color and warmth |
| Flavor Rub | Garlic powder | 1 tbsp | Savory depth |
| Flavor Rub | Onion powder | 1 tbsp | Sweet complexity |
| Heat Elements | Chili powder | 1 tsp | Controlled fire |
| Aromatics | Cumin | 1 tsp | Earthy undertones |
| Moisture | Apple juice | 1 cup | Spritz liquid |
| Wood | Hickory chips | 2-3 cups | Smoke foundation |
The beauty of beef back ribs lies in their ability to showcase simple seasonings. Resist the temptation to over-complicate your rub – these ribs shine when the natural beef flavor takes center stage.
Step-by-Step Guide to Cooking Perfect Beef Back Ribs
Preparation: Setting Your Foundation
Begin your preparation 2-24 hours before cooking. First, remove the silver membrane from the bone side of your ribs. This thin, translucent layer prevents seasoning penetration and causes the ribs to curl during cooking. Slide a knife tip under one corner, grip with a paper towel, and pull steadily until the entire membrane releases.
Apply your dry rub generously, working it into every crevice with your hands. The salt in your rub will begin drawing moisture from the surface, creating a pellicle that helps smoke adhere better. Wrap your seasoned ribs and refrigerate overnight – this extended contact time allows flavors to penetrate deeply.
Remove your ribs from refrigeration 45-60 minutes before cooking, allowing them to reach room temperature for even cooking.
The Low and Slow Method: Building Flavor Through Patience
Set your smoker to 225°F – this temperature strikes the perfect balance between breaking down tough connective tissues and maintaining moisture. Place your ribs bone-side down on the cooking grate, positioning them away from direct heat sources.
During the first 3-4 hours, resist the urge to peek frequently. Each time you open the lid, you extend cooking time by 15-20 minutes. Instead, focus on maintaining steady temperature through proper damper adjustments and fuel management.
Around the 3-hour mark, begin spritzing your ribs hourly with apple juice. This adds moisture and helps develop the coveted bark – that dark, flavorful crust that separates good ribs from great ones.
Navigating the Stall: When Progress Seems to Stop
Somewhere around 160°F internal temperature, your ribs will hit “the stall” – a phenomenon where internal temperature plateaus for hours. This happens as moisture evaporation cools the surface, creating an equilibrium that frustrates impatient cooks.
You have two options: push through the stall naturally (adding 2-3 hours to your cook), or employ the “Texas Crutch” method. To crutch, wrap your ribs in heavy-duty foil with 1/4 cup of apple juice or melted butter, then return them to the smoker. This steams the ribs through the stall, reducing total cooking time while maintaining tenderness.
Mastering Doneness: Reading Your Ribs
Forget rigid cooking times – perfect beef back ribs are done when they’re done. Your target internal temperature is 203°F, but more importantly, learn to read physical cues.
The “bend test” provides reliable feedback: lift your ribs from one end with tongs. Properly cooked ribs will bend easily and develop small cracks in the surface bark. The meat should pull back from the bone ends by about 1/4 inch, and a probe thermometer should slide through the thickest part like a knife through warm butter.
Final Touches: Elevating Your Results
During the final 30 minutes, consider glazing your ribs with your favorite BBQ sauce. Apply thin layers, allowing each to set before adding the next. This creates depth without overpowering the beef flavor you’ve worked so hard to develop.
For an extra touch of richness, brush your ribs with melted butter during the last 15 minutes. This creates an incredibly glossy finish while adding another layer of flavor.
Troubleshooting Common Beef Back Ribs Issues
Even experienced cooks encounter challenges. If your ribs emerge tough despite long cooking, the likely culprit is insufficient time rather than temperature problems. Beef back ribs require complete collagen breakdown, which only happens with extended exposure to low heat.
Dry ribs usually result from cooking at temperatures above 250°F or insufficient moisture management. Remember that spritzing every hour after the initial smoke development helps maintain surface moisture while building bark.
Conversely, mushy ribs indicate overcooking or wrapping too early. If you choose to crutch, wait until your bark development satisfies your expectations – typically around hour 4-5.
Serving and Storage: Maximizing Your Investment
Rest your finished ribs for 30-45 minutes before slicing. This allows juices to redistribute, preventing them from running out when you cut between bones. Slice cleanly between each bone, presenting individual ribs that showcase your handiwork.
Classic accompaniments include tangy coleslaw that cuts through richness, creamy mac and cheese for indulgence, and pickled vegetables for acidity balance. Don’t forget cornbread with honey butter – the sweetness complements the smoky beef beautifully.
Properly wrapped ribs keep 4-5 days refrigerated or up to 6 months frozen. Reheat gently in a 300°F oven, wrapped in foil with a splash of apple juice to restore moisture.
Frequently Asked Questions About Beef Back Ribs
How long do Beef Back Ribs take to cook properly? Perfect Beef Back Ribs typically require 6-8 hours at 225°F, depending on thickness and desired tenderness. Always cook to internal temperature (203°F) rather than time.
What’s the key difference between Beef Back Ribs and short ribs? Beef Back Ribs come from the ribeye section and contain less meat per bone but offer more intense beef flavor. Short ribs are cut from the plate section with higher meat content and more marbling.
Can I cook Beef Back Ribs in a regular oven successfully? Absolutely! Use a 275°F oven with a roasting pan and rack. Add liquid smoke to your rub and place a pan of water on the bottom rack for humidity.
Should I always remove the membrane from Beef Back Ribs? Yes, removing the membrane allows better seasoning penetration and prevents curling during cooking. Use a paper towel for better grip when pulling.
What internal temperature should Beef Back Ribs reach? Target 203°F internal temperature for optimal tenderness. This ensures complete collagen breakdown while maintaining moisture.
Transform your backyard into a BBQ destination with these Perfect Beef Back Ribs techniques. Your patience and attention to detail will be rewarded with results that create lasting memories and establish your reputation as a serious pitmaster. Fire up that smoker this weekend – your journey to beef back ribs mastery starts now!

